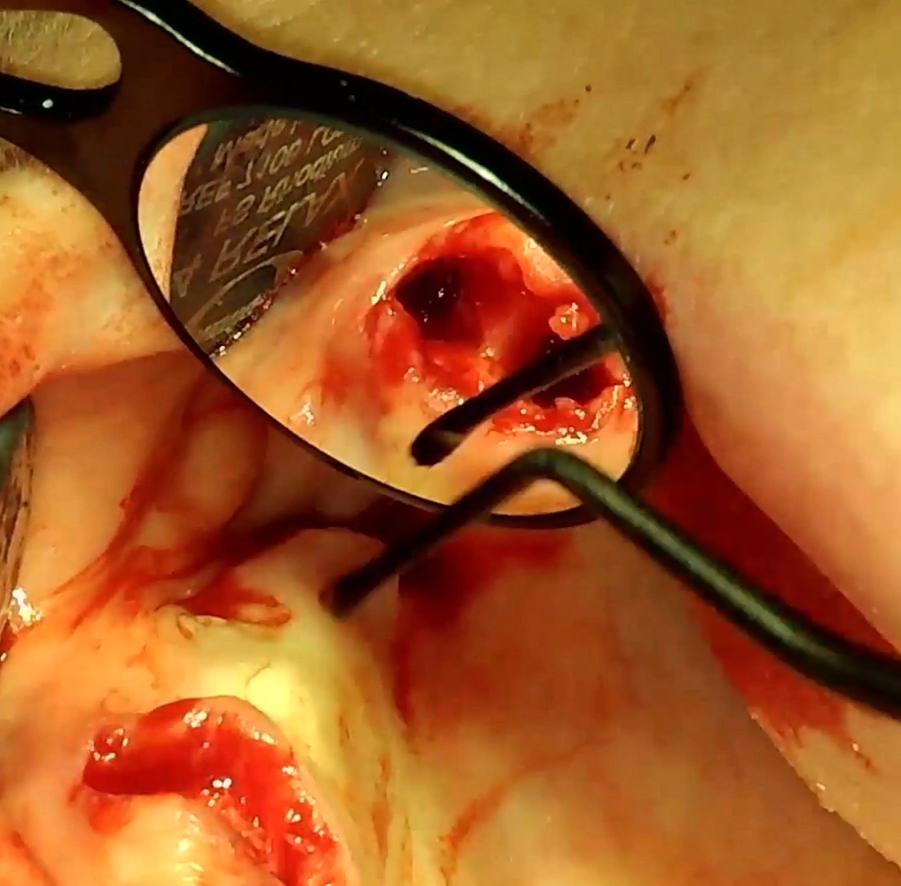
Extraction with Socket Augmentation
- Dental Migas Academy
- May 16
- 7 min read

Preserving the ridge before it disappears — what every clinician must know before raising the flap
The moment a tooth is lost, the countdown begins. Alveolar bone resorption — predictable, progressive, and largely irreversible — starts within days. The question is no longer whether to augment, but how to do it right from the very first incision.
Why the Socket Is Not Just an Empty Space
After extraction, the alveolar process undergoes a cascade of remodeling events that most clinicians underestimate. The bundle bone — the thin cortical plate lining the socket — is entirely dependent on the periodontal ligament for its blood supply. Once that ligament is severed, the bundle bone has no physiological reason to persist.
Clinical studies show that 40–60% of the original ridge width is lost within the first three years following extraction, with the majority of that loss occurring in the first six months. The buccal plate, thinner and more vascular, resorbs faster than the palatal or lingual cortex — leading to the classic horizontal and vertical deficiency that complicates implant placement.
What the evidence tells us — key numbers
~1.5mm Mean vertical ridge height loss at 6 months post-extraction (untreated socket)
~3.8mm Mean horizontal width reduction over 6 months in non-augmented sites
~50% Reduction in alveolar volume expected within 3 years without intervention
These numbers translate directly into surgical complexity. A site that could have received a standard implant without grafting often ends up requiring a staged GBR procedure, costing the patient additional time and money — and the clinician, considerable credibility.
"The best time to preserve the ridge is at the moment of extraction. The second-best time is right now — before you close."
Patient Selection and Timing: When to Augment
Not every socket requires augmentation, and indiscriminate use of bone substitutes is neither evidence-based nor cost-effective. Stratify your patients by risk:
High-priority candidates for socket augmentation
Planned implant site · Thin buccal plate (<1mm) confirmed on CBCT · Compromised socket (periapical pathology, fenestration) · Multiple adjacent extractions · Anterior esthetic zone · Young patients with long edentulous periods ahead
Relative contraindications — proceed with caution
Active, uncontrolled infection at the extraction site (debride first, stage the graft) · Uncontrolled systemic disease (HbA1c >8 in diabetic patients) · Active bisphosphonate therapy — confirm medication history and consider MRONJ risk · Heavy smokers: set realistic expectations and consider delaying implant loading
Timing matters as much as technique. The immediate extraction socket (Type 1) offers the biological advantage of native clot and an intact periosteum, but demands meticulous flap management. Waiting 4–8 weeks for soft tissue maturation (Type 2) simplifies closure but may mean working with a partially resorbed buccal plate. Know your biology — and plan accordingly.
The Step-by-Step Protocol
A reproducible augmentation protocol is the foundation of consistent outcomes. The following sequence reflects current best practice:
Phase 1 — Atraumatic extraction
Periotome-first approach: luxate the periodontal ligament circumferentially before applying any rotational force. The goal is to preserve every millimeter of remaining buccal cortex.
Use a piezosurgical device for multirooted teeth or ankylosed roots. Ultrasonic cutting dramatically reduces the risk of buccal plate fracture compared to conventional forceps in high-risk anatomical sites.
After root removal, curet the socket walls thoroughly to remove granulation tissue and biofilm — but avoid over-instrumentation of the periosteal attachment at the socket base.
Irrigate copiously with sterile saline. Assess the integrity of all four socket walls by probing. Document findings — particularly buccal plate status — in the patient record.
Phase 2 — Graft placement
Hydrate your graft material per manufacturer instructions. Do not rush this step — dry particles compact poorly and integrate unpredictably.
Fill the socket in increments, condensing gently with a plugger. Target 90–95% socket fill; overpacking above the crestal level risks flap necrosis and membrane exposure.
Position the collagen membrane (or alternative barrier) to cover the graft and extend 2–3mm onto surrounding cortical bone. Tuck the membrane slightly subperiosteally to prevent displacement.
Stabilize the membrane with a collagen plug, sutures, or both. The membrane must not move with tongue pressure or normal mouth function.
Phase 3 — Tension-free closure
Release the periosteum with a horizontal releasing incision at the base of the buccal flap if primary closure is required. Advance 3–5mm to achieve passive adaptation without tension.
Suture with 5-0 or 6-0 monofilament (PTFE or nylon). Mattress sutures provide the best wound stability for socket sites. Interrupted sutures at the interproximal papillae complete the closure.
In open-healing protocols (socket seal technique), prepare a connective tissue graft or dense PTFE membrane as a biologic seal rather than primary closure — this avoids flap advancement and preserves vestibular depth.

Graft Material Selection: A Practical Framework
The market offers an overwhelming number of bone substitutes. Strip away the marketing and focus on three functional properties: osteoconductive scaffold quality, resorption kinetics, and handling characteristics. The following matrix summarizes the clinically relevant options:
First choice
Deproteinized bovine bone mineral (DBBM)
· Slow resorption ensures volume maintenance during healing · Extensive long-term evidence · Ideal when implant timing is 4–6 months
First choice
Allograft (DFDBA / FDBA)
Predictable osteoconduction · DFDBA retains some osteoinductive potential · Preferred by clinicians seeking to avoid xenografts on ethical or patient-preference grounds
Adjunct
Autogenous bone chips
Gold standard biologically · Rapid resorption limits volume maintenance · Best used as an additive (20–30% mix) to stimulate early vascularization alongside a slower-resorbing scaffold
Adjunct
Synthetic calcium phosphates
Hydroxyapatite and β-TCP ceramics · Fully xenograft-free option · Resorption rate varies widely by formulation — confirm with specific product data before use
Emerging
Concentrated growth factors (CGF/PRF)
Autologous fibrin matrix rich in PDGF, VEGF, TGF-β · Does not replace scaffold material · Used as membrane alternative or mixed into graft to enhance early angiogenesis and cell migration
Emerging
Biphasic ceramics + growth factors
Next-generation composites combining HA/TCP scaffold with rhBMP-2 or rhPDGF-BB · Strong early evidence but high cost limits routine use · Consider in compromised or large-volume defects
Clinical pearl — particulate size matters
In socket augmentation, medium-sized particles (0.25–1mm) consistently outperform fine or coarse granules. Fine particles compact and may limit vascularization; coarse particles leave interstitial gaps that fill with fibrous tissue. When the choice is available, select the mid-range particle size from your chosen product line.
Membrane Selection: Resorbable vs. Non-Resorbable
The barrier membrane serves a single biological purpose: to exclude fast-proliferating epithelial and connective tissue cells from the graft space, while allowing slower osteoprogenitor cells to colonize the scaffold undisturbed. The choice between resorbable and non-resorbable membranes is not about superiority — it is about indication.
Resorbable collagen membranes are the workhorse of socket augmentation. They require no second surgery, degrade predictably over 4–6 months, and support fibroblast attachment and angiogenesis. Their main limitation is that they cannot maintain space against soft-tissue pressure in large, unsupported defects.
Non-resorbable membranes (e.g., titanium-reinforced PTFE, dense PTFE) are indicated when the defect requires space maintenance — typically a horizontal bone deficiency exceeding 5mm, or a simultaneous GBR procedure requiring rigid tent-poling. Expect a membrane retrieval procedure at 6–8 months. Exposure is the primary complication and occurs in approximately 15–20% of cases even in experienced hands; counsel patients accordingly.
In the simple post-extraction socket with intact walls, a bilayer collagen membrane placed in the open-healing position (coronal aspect of the socket sealed, graft protected) delivers excellent outcomes with minimum procedural complexity.

Managing Complications: What to Do When Things Go Wrong
Membrane exposure
Early exposure (<2 weeks): irrigate with 0.12% chlorhexidine, advise soft diet, and monitor weekly. Minor exposures (≤3mm) often resolve spontaneously with conservative management. Larger exposures compromising the graft warrant early membrane removal and reassessment at 3 months. Non-resorbable membrane exposure must never be left unmanaged — bacterial colonization of the PTFE surface will lead to graft loss.
Post-operative pain and swelling beyond day 5
Distinguish between normal inflammatory response and early-onset infectious osteitis. Culture if possible; empirical antibiotic therapy (amoxicillin-clavulanate or clindamycin in penicillin-allergic patients) started within the first 72 hours substantially improves salvage rates. A dry socket (alveolar osteitis) in an augmented site is rare but demands irrigation and gentle debridement without disturbing the graft.
Flap dehiscence
Resist the urge to re-suture under tension — you will make it worse. Allow secondary intention healing for small dehiscences (<3mm). For larger openings exposing the graft, apply a PRF membrane as a biological dressing and convert to an open-healing protocol if conditions allow.
Insufficient bone volume at re-entry
If CBCT at 4–6 months shows inadequate fill, evaluate before cutting. Confirm timing — some DBBM-based grafts continue to remodel and gain radiographic density beyond 6 months. If volume is truly inadequate, stage a secondary GBR rather than placing a compromised implant. A well-timed staged approach consistently outperforms a poorly positioned implant in the long term.
The Open Healing (Socket Seal) Alternative
Primary closure is not always necessary — or even desirable. The socket seal technique, described by Landsberg and popularized through subsequent RCT data, uses a free epithelial graft or connective tissue graft to seal the coronal socket opening while allowing the graft beneath to heal in a semi-closed environment. This approach avoids flap advancement, preserves keratinized tissue, and eliminates vestibular depth loss.
Dense PTFE membranes (d-PTFE) can serve as synthetic socket seals. Their extremely small pore size (~0.2μm) prevents bacterial ingress even when exposed to the oral environment, making intentional open-healing feasible and predictable.
When to choose open healing over primary closure
Insufficient keratinized tissue for flap advancement
Large sockets where tension-free closure would require aggressive periosteal releasing
Cases where vestibular depth preservation is a priority
Patients unable to tolerate a palatal donor site for connective tissue harvest
Radiographic Assessment and Re-entry Timing
CBCT at 4–6 months post-augmentation provides the most reliable three-dimensional assessment of graft consolidation. Evaluate bone width at the planned implant axis, residual defect morphology, and cortical plate continuity. Two-dimensional periapical films are useful for monitoring, but insufficient for implant treatment planning.
At re-entry, the graft should feel dense and resemble cortical bone on drilling. Resistance to the pilot drill is a reliable intraoperative proxy for mineralization quality. If the site bleeds readily on initial preparation — a positive sign of vascularization — and offers appropriate resistance through the first two drill increments, proceed with confidence.

Key takeaways for clinical practice
1. Intervene at extraction, not after. Ridge preservation is exponentially more cost-effective than regeneration of a resorbed ridge. Make augmentation the default at any planned implant site, not the exception.
2. Protect the buccal plate. Every incremental improvement in your atraumatic technique — periotomes, piezosurgery, patience — directly translates to less augmentation material needed and better implant esthetics.
3. Match material to biology. DBBM for volume-stable slow grafts. Autograft chips as a biological accelerant. PRF/CGF to enhance early angiogenesis. Layering these strategically outperforms any single material used alone.
4. Tension-free closure is non-negotiable. A perfectly placed graft under a flap sutured with even modest tension will fail. Release early, suture late, and inspect daily in the first week.
5. Stage when in doubt. A compromised implant in an inadequately regenerated site creates a far more complex clinical problem than a well-planned staged approach. Delay is not failure — it is judgment.

Comments